Tuesday, 14 June 2011
Thursday, 28 April 2011
Gapps-Using Collections to Organise and Share
Recently I began using Google Apps in my classroom. I have been trying to exploit the collaboration Google Docs allows in my classroom by experimenting with the different sharing settings on documents. Google Docs allows the owner of the document to decide who can access or edit it.
I frequently encounter the issue that students forget to share a document with the right people or they share it with too many people (the World). I have been looking for a way to simplify this process of sharing.
This week I decided to restructure my ‘Collections’, these are the Google Docs version of folders. I found this organisation session helped solve my sharing issues. ‘Collections’ have sharing options and the documents in a ‘Collection’ take the sharing settings from the ‘Collection’ they are placed in, as long as the document owner places it in the ‘Collection’. This way you do not need to set the setting of individual documents just drag them in to the appropriate ‘Collection’.
What I have done is set up a Collection for each of the different subjects I teach.


You can then set sharing settings for each of these collections.

Also because these documents are in "Collections" not "Folders" they can appear more than once, adding it to a Collection is like adding a tag, and you can have multiple tags. So if you have multiple courses that need access to the same generic document just drag it into all of the Collections and all of these will be added to it.
If the student wants to share their work with you they only need to drag the work into the collection with their name this also means you can share feedback with them the same way.

As the sharing settings are taken from the ‘Collection’ rather than the individual document it can be better to set up a classwork ‘Collection’ shared with all students in the group then keep the Parent Course ‘Collection’ only shared with the teachers this way students can access the classwork but not each others documents.
I have found this to be a far more straight forward way of students sharing work with me and me sharing feedback with them (along with tidying up my own gdocs).
Students can also create their own collections this can be great for collaborative group work.
I have found this to be a far more straight forward way of students sharing work with me and me sharing feedback with them (along with tidying up my own gdocs).
Students can also create their own collections this can be great for collaborative group work.
Saturday, 5 March 2011
Jog the Web-Guided Research
The first time I had used Jog the Web was with staff to try and guide them through a series of Moodle resources for a CPD session I was running. With staff it did not work as well as I had hoped as I they did not seem to 'get it'.
Jog the Web allows you to visit a number of sites in a structured order. It embeds the sites within a different page on which you can add titles and instruction. Staff members seemed to be confused by this, and the learning stumbled. Maybe due to my own explanation, lack of differentiation or the wrong choice of tool. I really just did not work.
However...In the last few weeks I gave it another go.
With my BTEC Graphics students I was struggling to find a way to structure a research task in a guided and supportive way. I decided the learning need suited trying this tool again.
The students are currently redesigning logos and the look of the colleges own Moodle site and they needed to become more aware of how to visually analyse design and what sort of questions to ask. Jog the web was ideally suited to this.
 To create the jog:


Jog the Web allows you to visit a number of sites in a structured order. It embeds the sites within a different page on which you can add titles and instruction. Staff members seemed to be confused by this, and the learning stumbled. Maybe due to my own explanation, lack of differentiation or the wrong choice of tool. I really just did not work.
However...In the last few weeks I gave it another go.
With my BTEC Graphics students I was struggling to find a way to structure a research task in a guided and supportive way. I decided the learning need suited trying this tool again.
The students are currently redesigning logos and the look of the colleges own Moodle site and they needed to become more aware of how to visually analyse design and what sort of questions to ask. Jog the web was ideally suited to this.

- I found a range of exemplar Moodles and opened them up on seperate browser tabs
- Signed into Jog The Web (It is free to sign up though there is a premium option)
- Clicked to create a new jog
- Add title and details to categorise your jog

- Then it is you simply add the pages to your jog

- A more recent feature is that you can also add your own content to a range of templates. These could be used to punctuate your jog or possibly extension tasks.

- Make sure you save each page at the bottom.
- You can easily change the page order at any stage or edit any parts.
This tool definitely supported the learning of less-able students in the class but was not overly intrusive and allowed more-able students to work more independently. I it used to focus class discussion of Moodle sites as well as individually; where the questions along the top were used to help focus on what type of annotation might be appropriate for different sites.
 |
| Visual Identity |
Students 'got this' and on the whole annotation has improved because of the individual support using this allows. One student said "When you look at something you make judgements in your head but I only realised this when what my head said matched the questions at the top".
Monday, 28 February 2011
What to do with left over drawing ink.
 |
| Blank Colour Wheel |
 |
| Colour Wheel Poster |
I often use drawing ink in my classroom to demonstrate Tie-Dye and put colour theory in to practice. As drawing ink is not permenent/washable on fabric I use paper napkins as these are also a cheap alternative which means students can experiment with more folds and patterns. Though this method would also work with fabric dyes.
Equipment:
4 Plastic cups,
Red, Blue and Yellow Drawing ink
Paper Napkins
String
Latex Gloves
Aprons
Method
Fold the napkins in different ways to create patterns. All of the folding techniques I use are based on the basic accordion fold.


 |
| Fold Pattern 1 |
 |
| Fold Pattern 2 |
 |
| Fold Pattern 3 |
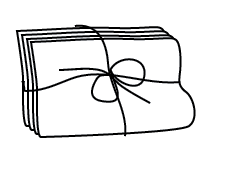
Once you have folded the napkin you tie it in one of 2 ways (the different ways will also create patterns). You can fold it into a cube and parcel tie it or fold it into a long rectangle and tie it length ways.

Now you are ready to start dying. Put the primary colours in 3 separate beakers (You can use Red, Yellow and Blue OR Magenta, Yellow and Cyan)

Dip the bound parcel into the different colours one after the other to different depths making sure your final dip completely coats the parcel. (Make sure you have gloves on) The squeeze the excess off into the 4th beaker then unwrap carefully. This part really has the WOW factor as the brown looking bundle turns into a rainbow.
 |
| Fold Pattern 1 |
 |
| Fold Pattern 2 |
 |
| Fold Pattern 3 |
As you will see the primary colours naturally mix to create the other colours.
Sunday, 20 February 2011
What a difference a year makes-Twitterversary

Yesterday was my 1st year Twitterversary and this has made me reflect on how using twitter has changed my life.
Now that sounds very dramatic but it has; especially when it comes to my professional life as a teacher.
In the past year using Twitter has:
- Informed me of TeachMeets, events and conferences that I never knew existed-I even helped organise a TeachMeet (#TMX) and presented at the first TeachMeet I attended (#tmmoodle). I am now a regular at TeachMeets and really enjoy learning from other teachers and sharing my own classroom experiences.
- Shared tools, learning opportunities and helped me develop teaching ideas for my classroom
- Given me a platform to discuss and reflect upon my own classroom practice and teaching /education as a profession
- Allowed me to take part in crowd-sourced projects that have given me reasons to develop my own Art and Illustration skills (for example #ukedchat and #pgcetips where I designed the illustrations for the book)
- Helped me connect with hundreds of inspiring and engaging individuals.
I feel that 1 year on I am a better teacher, not only because of the opportunities to reflect and learn from others that have arisen, also because of the confidence I have developed to experiment and question the learning in my classroom.
The most important thing that I will take away from my first year of Twitter is how much goodwill there is still in the world and how supportive communities of people are.
Subscribe to:
Posts (Atom)